If you’ve ever taken a CPR certification course, you’ve likely heard of the acronym CAB—Compressions, Airway, and Breathing. These three steps are the core principles of CPR (Cardiopulmonary Resuscitation) and are essential in saving lives during cardiac emergencies.
Understanding the CAB sequence is crucial for both healthcare professionals and laymen alike. Whether you’re a fitness trainer, teacher, coach, or simply a concerned citizen, knowing how to perform CPR correctly can make the difference between life and death.
In this blog, we will break down the CAB method in CPR, discuss its importance, and provide actionable insights on how you can get CPR certified through accredited courses like the CPR Certification American Heart Association training.
Understanding CAB: Compressions, Airway, and Breathing
1. C – Compressions: The Foundation of CPR
Chest compressions are the first and most critical step in CPR. When a person experiences cardiac arrest, their heart stops pumping blood to vital organs, including the brain. Immediate and effective chest compressions help maintain circulation until professional medical help arrives.
How to Perform Chest Compressions:
- Place the heel of your hand in the center of the victim’s chest, just below the nipple line.
- Interlock your fingers and keep your arms straight.
- Push hard and fast—at least 2 inches deep at a rate of 100-120 compressions per minute
- Allow the chest to fully recoil between compressions.
Performing high-quality compressions increases the chances of survival and ensures that oxygenated blood continues to circulate throughout the body.
2. A – Airway: Ensuring a Clear Path for Oxygen
After performing 30 compressions, the next step is to open the victim’s airway to allow for rescue breaths.
Steps to Open the Airway:
- Place one hand on the victim’s forehead and gently tilt the head back.
- Use two fingers to lift the chin upward.
- Check for any obstructions (such as food, vomit, or an object) that may be blocking the airway. If visible, remove it carefully.
This maneuver is known as the head-tilt, chin-lift technique and helps clear the airway, making it easier for air to enter the lungs.
3. B – Breathing: Delivering Oxygen to the Lungs
Once the airway is open, the next step is rescue breathing. If the person is not breathing normally, you will need to provide two rescue breaths.
How to Perform Rescue Breaths:
- Pinch the victim’s nose shut.
- Create an airtight seal by placing your mouth over theirs.
- Deliver a slow breath (about 1 second long) and watch for the chest to rise.
- Give a second breath and continue with 30 compressions followed by 2 breaths until help arrives.
If a CPR mask or barrier device is available, it should be used to reduce the risk of infection. In order to understand how to perform CAB sequence effectively, it is crucial to obtain your certification through a trusted AHA-aligned provider, such as CPR Certification Boston.
Why Did CPR Change from ABC to CAB?
In the past, CPR was taught using the ABC sequence (Airway, Breathing, Compressions). However, in 2010, the American Heart Association (AHA) revised the guidelines to CAB because studies showed that immediate chest compressions were more effective in improving survival rates.
The AHA now recommends performing hands-only (compression-only) CPR on most adults who experience sudden cardiac arrest as it may reduce the time to initiation of CPR and result in delivery of a greater number of chest compressions with fewer interruptions for the first several minutes after adult out-of-hospital cardiac arrest.
Key Reasons for the Change:
- Prioritizing chest compressions ensures blood continues to circulate.
- Delaying compressions for rescue breaths wastes valuable time in critical situations.
- Many bystanders were hesitant to start CPR because of the mouth-to-mouth aspect; focusing on compressions first increases willingness to help.
These updates make CPR more efficient and easier to remember, helping both professionals and laypersons act quickly in emergencies. To learn more about how CPR works and the latest updates, get in touch with CPR Certification Boston right away!
How to Get CPR Certified?
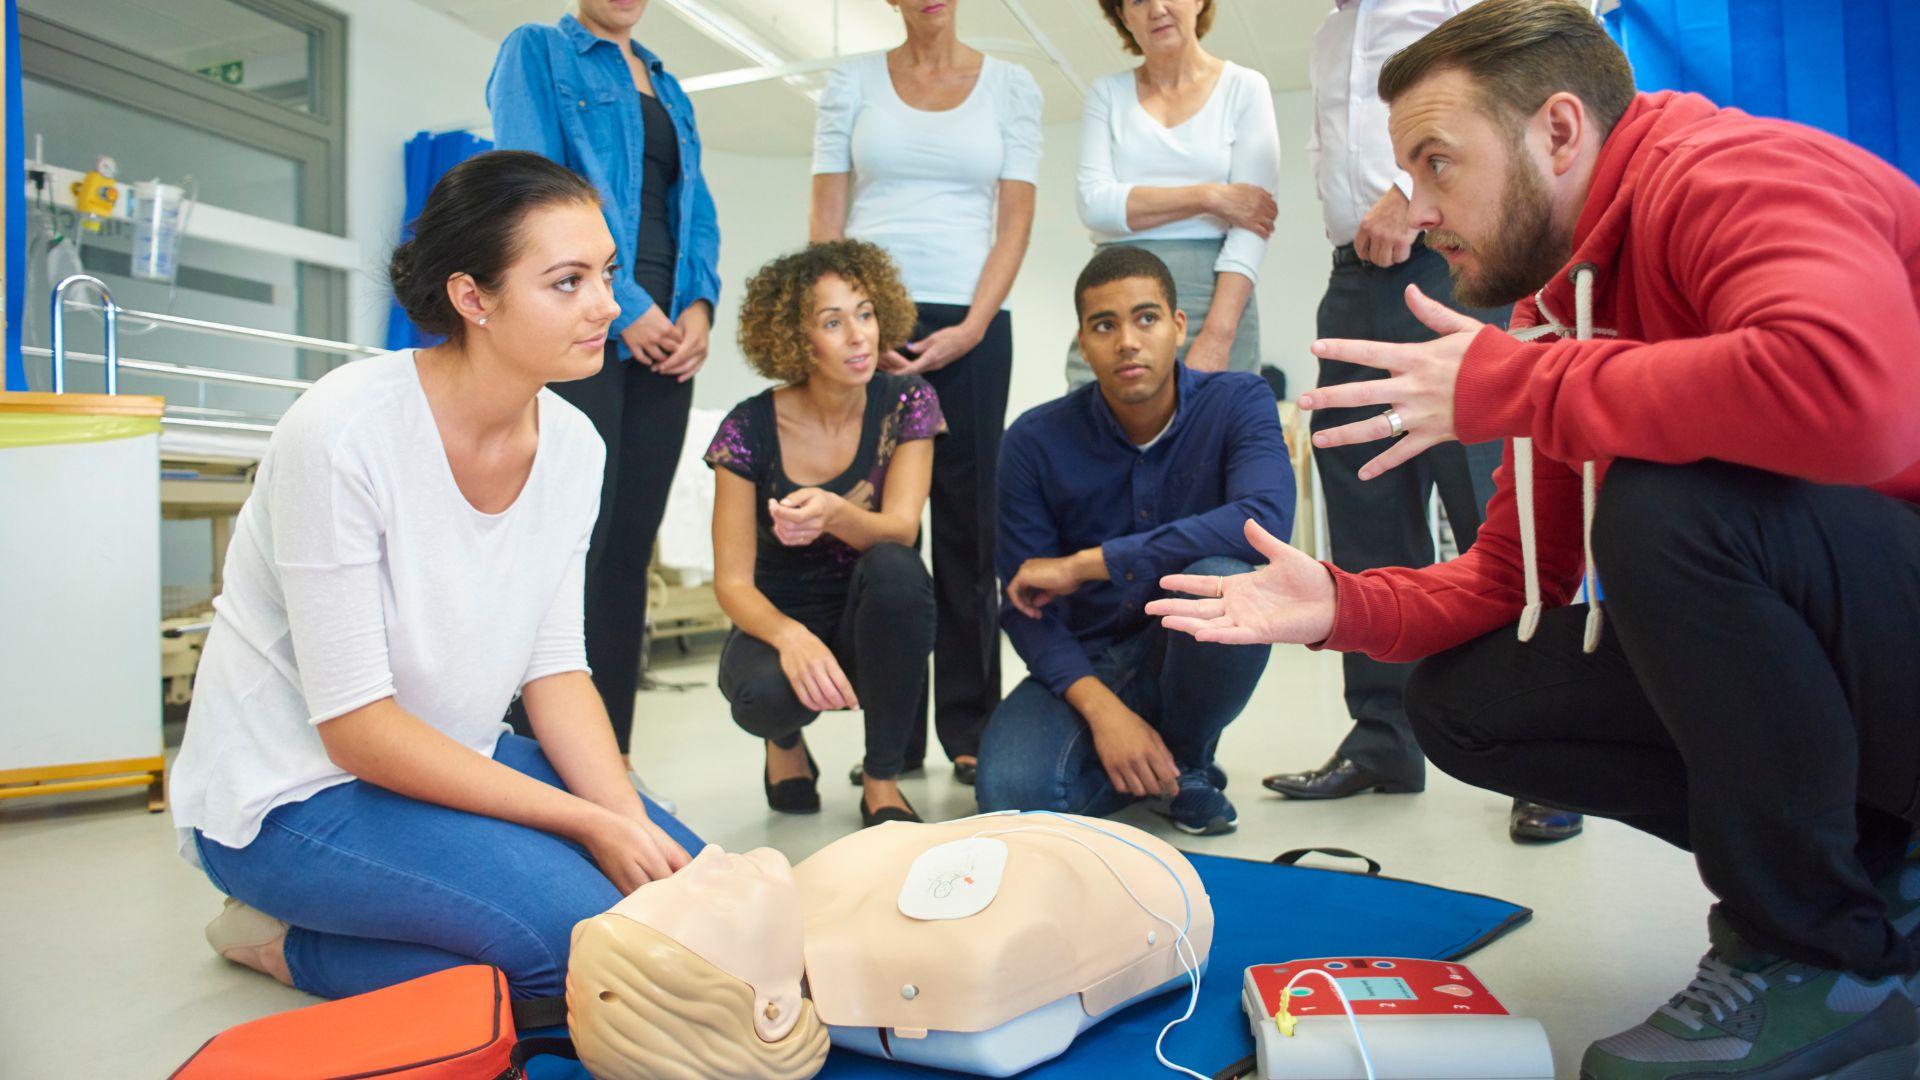
Obtaining your CPR certification is a straightforward process that ensures you are prepared to handle emergencies effectively. Here’s a detailed step-by-step guide to getting certified:
- Find a CPR Certification Class Near You – CPR training is available through organizations, such as CPR Certification Boston. The organization also provides flexible on-site training for groups of individuals and discount options.
- Complete the Training – The CPR certification course consists of theoretical knowledge and hands-on practice. You will learn vital techniques such as chest compressions, rescue breaths, and the proper use of an Automated External Defibrillator (AED). The training covers different scenarios, including adult, child, and infant CPR.
- Pass the Skills Assessment and Written Exam – To obtain your certification, you will need to demonstrate your ability to perform CPR correctly in a simulated emergency scenario. Additionally, a written test will assess your understanding of CPR principles, including the CAB sequence and the importance of timely intervention.
- Receive Your CPR Certification Certificate – Once you successfully complete the course and assessments, you will receive your official CPR certification certificate. This certification is typically valid for two years and signifies that you are trained to respond to cardiac and breathing emergencies.
- Renew Your Certification – Since CPR guidelines and best practices evolve, it is essential to renew your certification when it expires. Many organizations offer CPR Certification First Aid refresher courses to keep you updated on the latest techniques and reinforce your skills.
Frequently Asked Questions
1. How long is CPR certification good for?
Most CPR certification certificates are valid for two years. After this period, you must renew your certification by taking a refresher course.
2. Who should get CPR certified?
Anyone can benefit from CPR certification classes, but it is especially recommended for:
- Healthcare professionals (nurses, doctors, paramedics)
- Teachers and school staff
- Coaches and fitness trainers
- Childcare providers
- Workplace safety officers
- Parents and caregivers
3. Do I need prior medical training to take a CPR course?
No, CPR certification courses are designed for individuals with no prior medical experience. They provide step-by-step guidance to ensure everyone can perform CPR confidently.
4. Can I take CPR certification classes online?
Yes, many organizations offer blended learning courses, where you complete the theory online and attend an in-person session for hands-on practice. However, if CPR Certification is a professional requirement for you, it is best to check with your employer.
Final Thoughts: Get CPR Certified with CPR Certification Boston
Knowing CAB in CPR can help you save a life in an emergency. By understanding Compressions, Airway, and Breathing, you can confidently perform CPR when it matters most.
At CPR Certification Boston, we provide:
- American Heart Association-approved courses
- CPR and First Aid certification for individuals and groups
- Flexible class schedules to fit your needs
- Experienced instructors for hands-on training
Be prepared to take action—sign up for a CPR certification course today!